
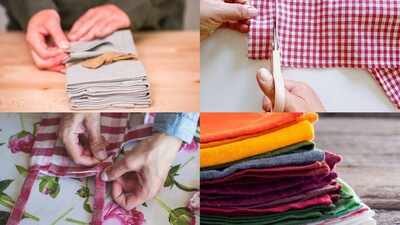
That old cotton kurta with a stain that never quite came out, or the button-down shirt you’ve outgrown but can’t bring yourself to bin, still has plenty of life left in it. Turning it into a set of kitchen napkins takes barely any effort, no sewing machine, no needle, and honestly, not much time either. All you really need is a good pair of scissors and about twenty minutes. Here’s how to do it properly so the napkins actually hold up to regular use and washing.
Pick the right piece of fabric
Look for the largest uninterrupted stretch of fabric on the garment, the back panel of a shirt or kurta usually works best, and unroll the sleeves too if you need a bit more material. Cotton and linen are ideal here, they’re absorbent and easy to cut cleanly. If you’ve got an old cotton T-shirt lying around instead, even better in some ways, jersey knit fabric barely frays at all once cut, so you can skip a few of the edge-finishing steps below entirely.
Cut clean squares to size
Decide how big you want your napkins, anywhere from a 30 to 45 centimetre square works well for everyday kitchen use, and mark it out with a ruler and a bit of chalk or a washable marker before cutting. Cutting along a straight line rather than eyeballing it makes a real difference to how neat the finished napkin looks, and a rotary cutter with a cutting mat gives you the cleanest edges if you have one on hand.
Trim the edges with pinking shears
This is really the trick that makes the whole thing possible without sewing. Pinking shears, the scissors with a zigzag blade, cut fabric on a slight bias, which genuinely slows down fraying on tightly woven cotton. Go around all four edges of each napkin with the pinking shears, cutting as close to the raw edge as you comfortably can. It won’t stop fraying completely forever, but it buys you a lot of wear and plenty of washes before it becomes an issue.
Seal the edges for extra durability
If you want your napkins to last through regular use without fraying further, run a thin line of fabric glue or a liquid seam sealant along each pinked edge and let it dry completely before using. In a pinch, clear nail polish does much the same job, just apply it carefully and avoid dripping any onto the rest of the fabric. This step isn’t strictly necessary, but it noticeably extends how long the edges stay neat.
Give them a final press
Once the edges are trimmed and, if you’ve chosen to seal them, fully dry, run a hot iron over each napkin. This flattens out any stubborn creases and gives the fabric a slightly crisper finish, so they don’t look like they were just cut from an old shirt five minutes ago. It’s a small step, but it genuinely makes the finished napkins look far more intentional.
Know they’ll need a little upkeep
Pinked edges aren’t completely permanent, especially with frequent washing, so don’t be surprised if you notice a bit of fraying starting at the points after several months of use. When that happens, simply trim the edge again with the pinking shears, and you’re back to a clean finish in under a minute. It’s a small trade-off for skipping the sewing machine entirely.
Disclaimer:
This article is intended for general informational purposes only. Use scissors and pinking shears carefully, and keep them away from children. Fabric glue and seam sealants should be allowed to dry fully before the napkins come into contact with food or hot surfaces.